How to Get Started
13 easy steps to get started with Photochooser.
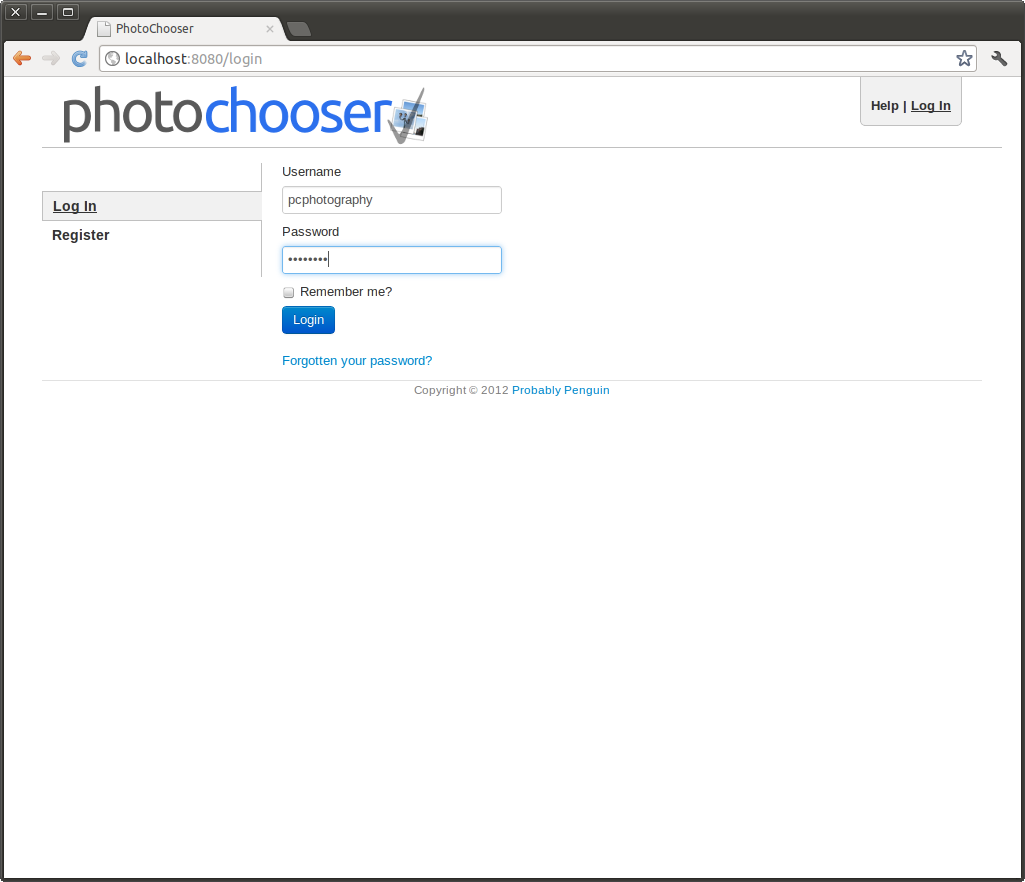
1. Log in
Start by logging in with your registered user name and password. If you do not have an account you can registered for free here.
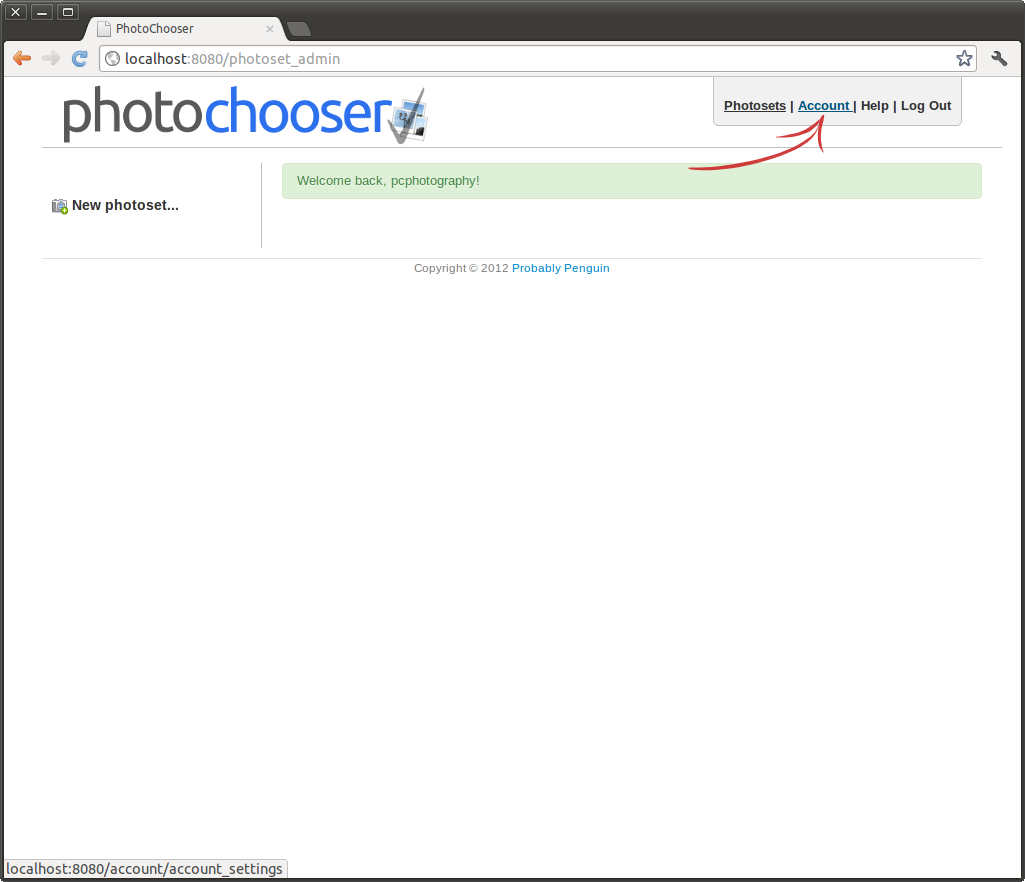
2. Go to the account page
It is recommended that configure your account before you start using Photochooser. Click on the Account link in the top right corner.
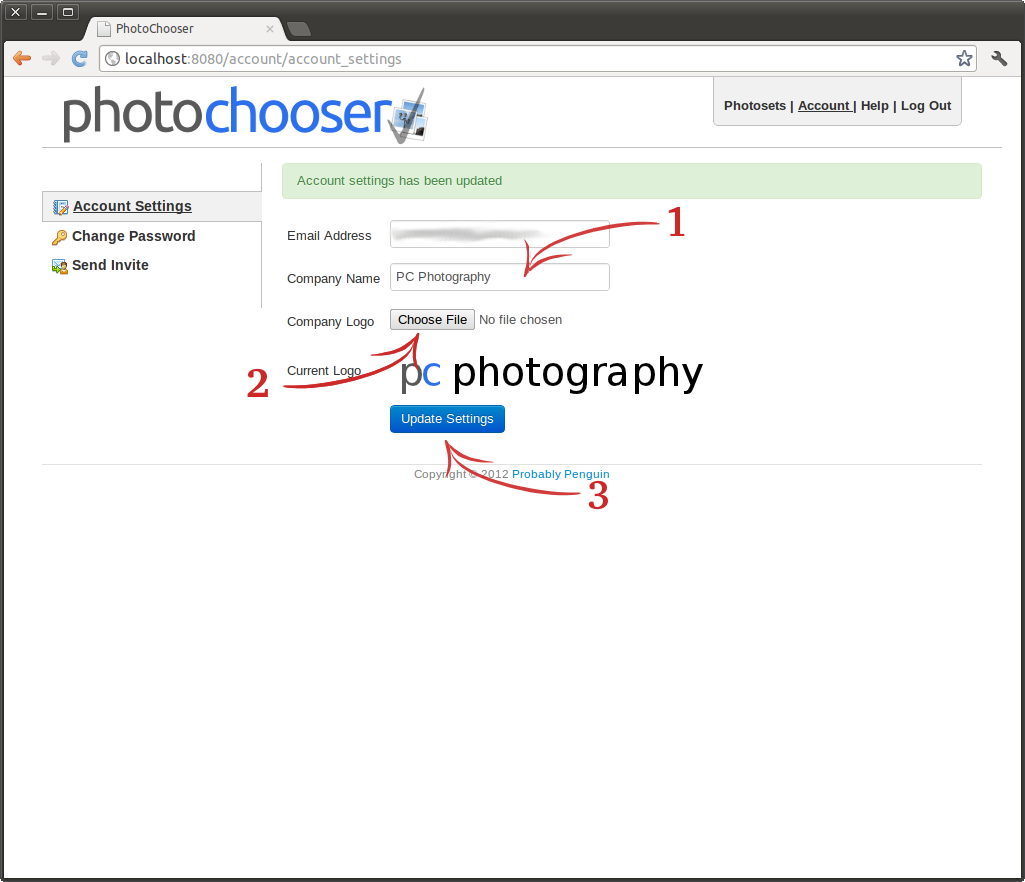
3. Configure your account
Enter the name of your company and upload your logo. The logo should be a 400px wide and 50px high transparent PNG. If the image is not the correct size it will be automatically resized by the system.
Click the "Update settings" button to save your changes.
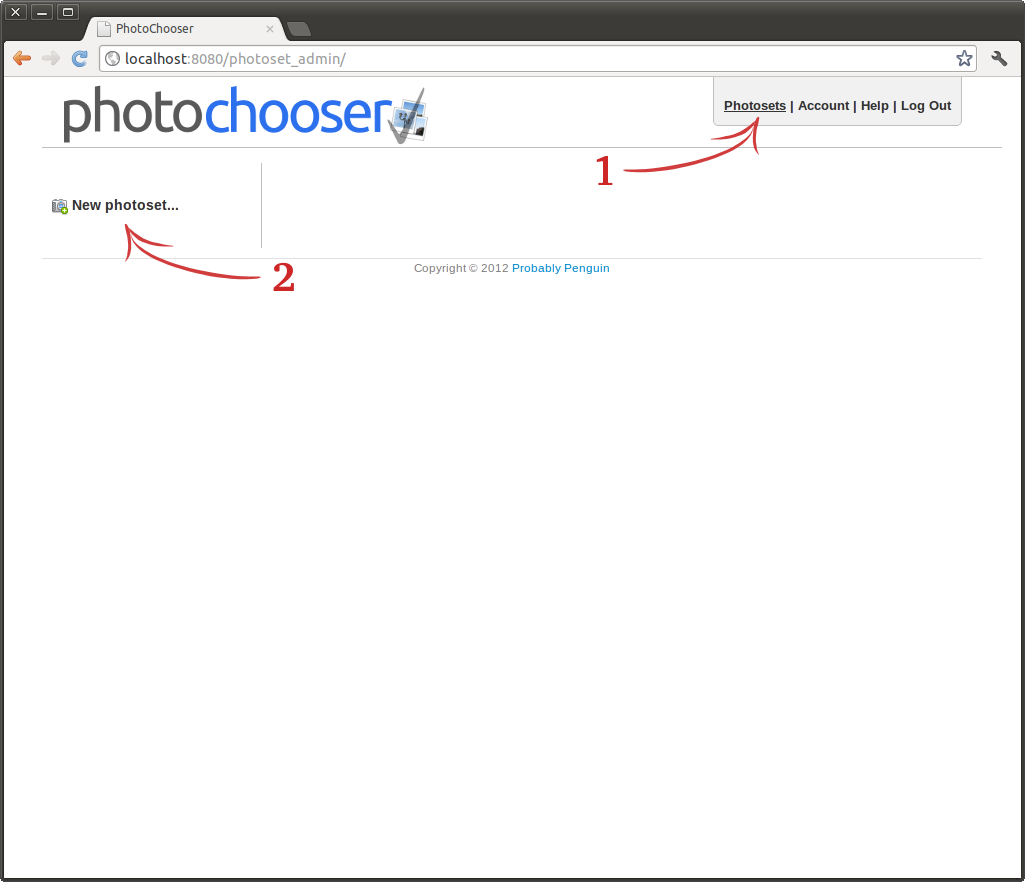
4. Create a new photoset
Click the Photoset link at the top of the page and then click the New photoset link in the lefthand menu. This will take you to the page where you can configure a new photoset.
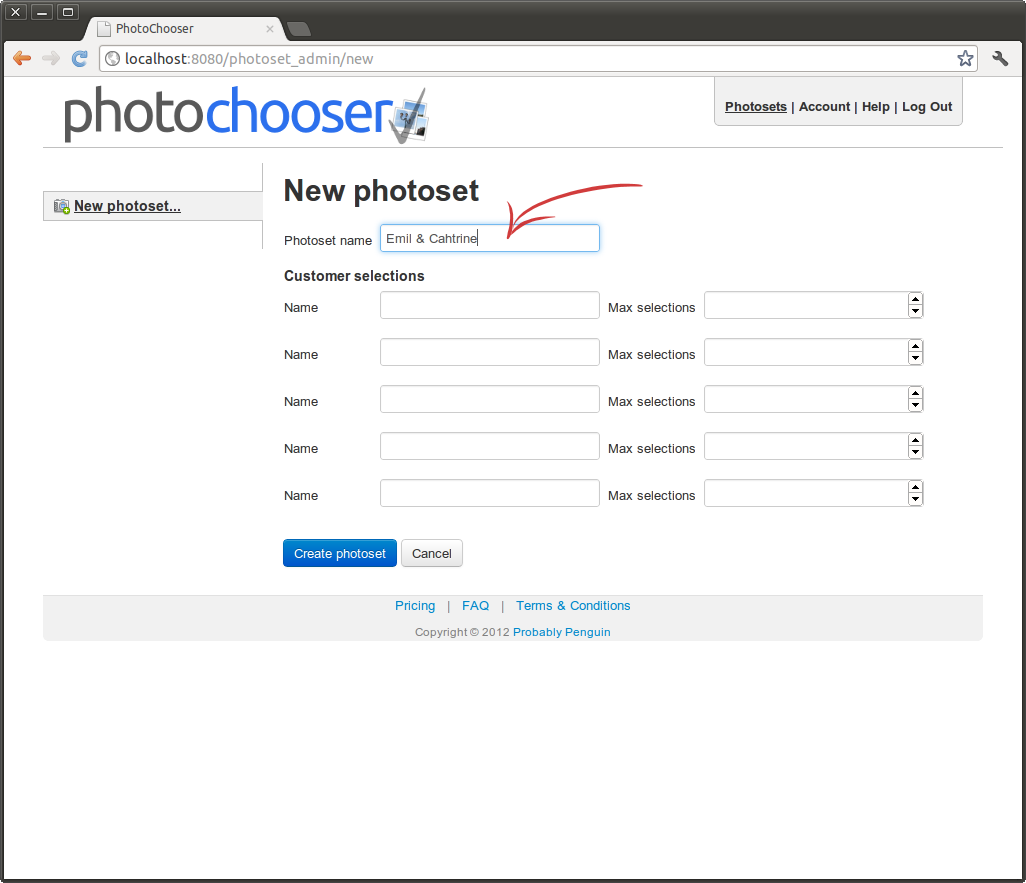
5. Set name
You can now configure the photoset. Start by adding a good name. This will be shown as the title of the page for you customer. If you are not happy with the name you have created you can always change it later.
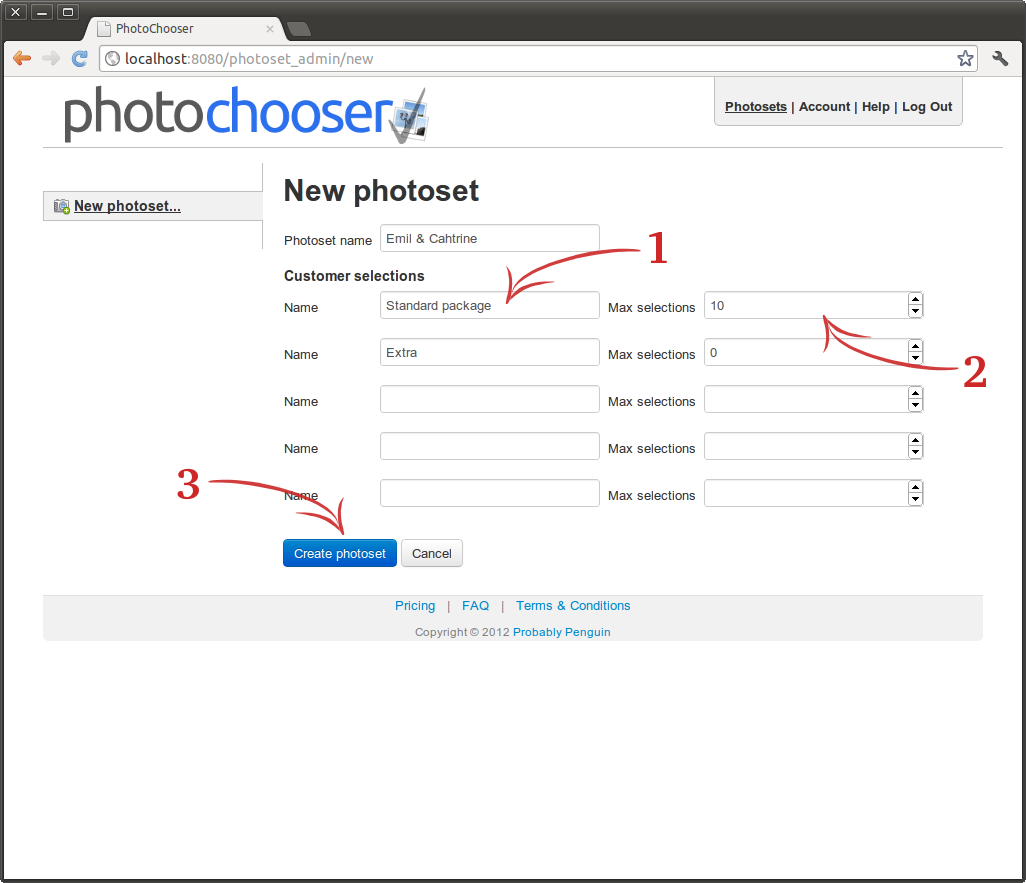
6. Add selections
Now add the selections that your customer can make. You can have up to five different selection names.
EXAMPLE: You can call a selection "Standard package" and give it a limit of 10 photos. If you do not want to limit
the number of selections that your customer can make just set the limit to 0.
Other names for selections could be "Black & White", "Print" or "Edit". This all depends on what kind of deal you have
with your customer.
When you have finished this part click the "Create photoset" button to create the photoset.
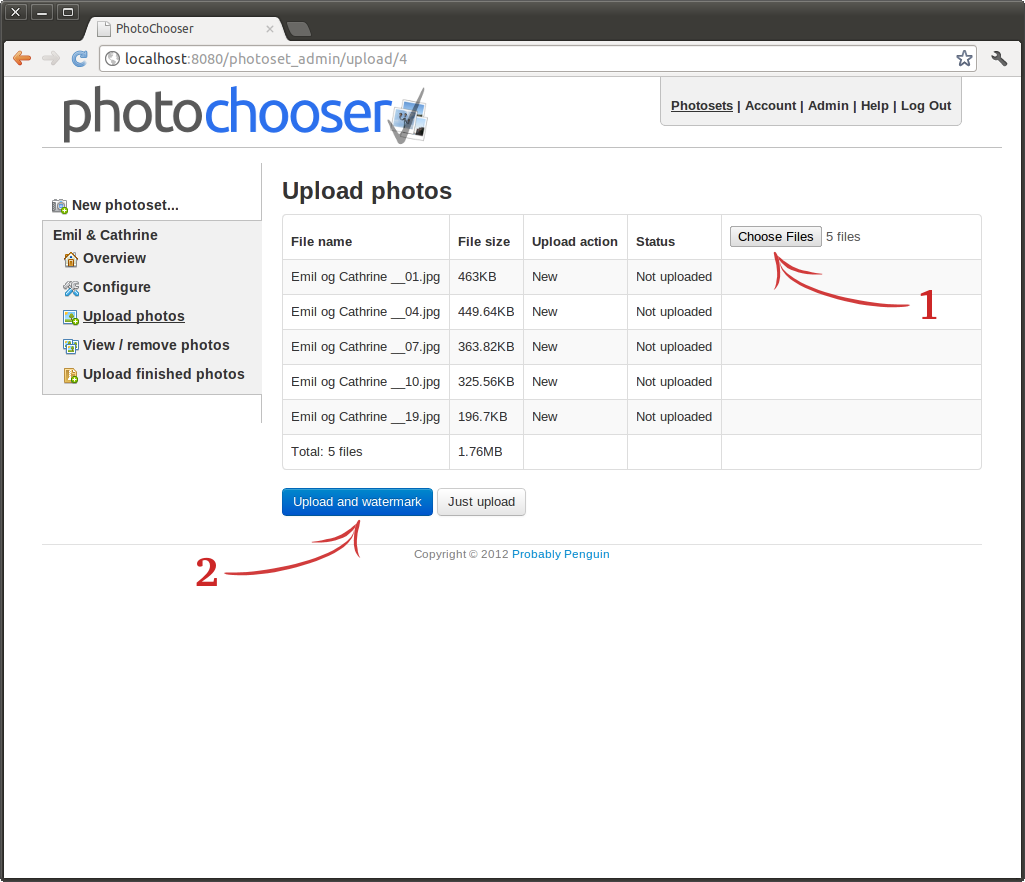
7. Choose photos
Next select the photos that you want to upload. You can select multiple photos at once.
When you have selected all photos click "Upload and watermark". The photos will noq be uploaded to the photoset and
the system will automatically generate thumbnails and watermark all photos. If you don't want the system to add
watermarks click the "Just upload" button.
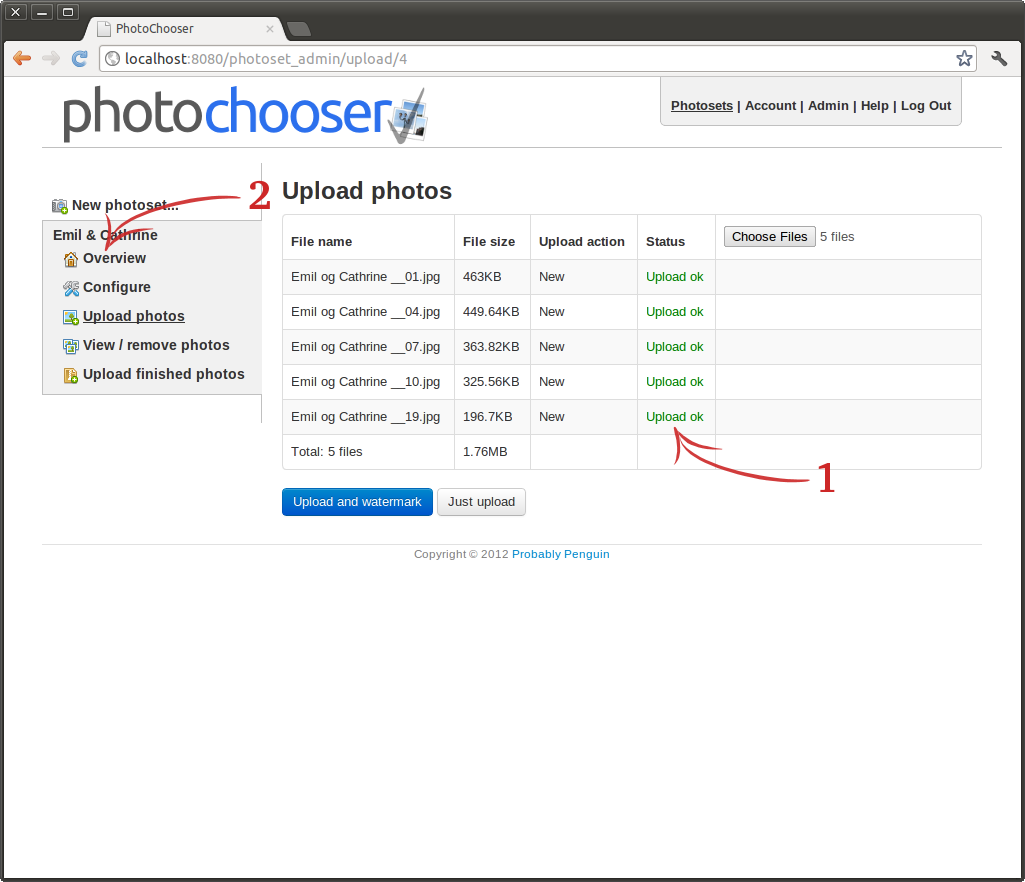
8. Go to photoset overview
When all the photos have been completely uploaded go to the photoset Overview page by clicking "Overview" in the left hand menu.
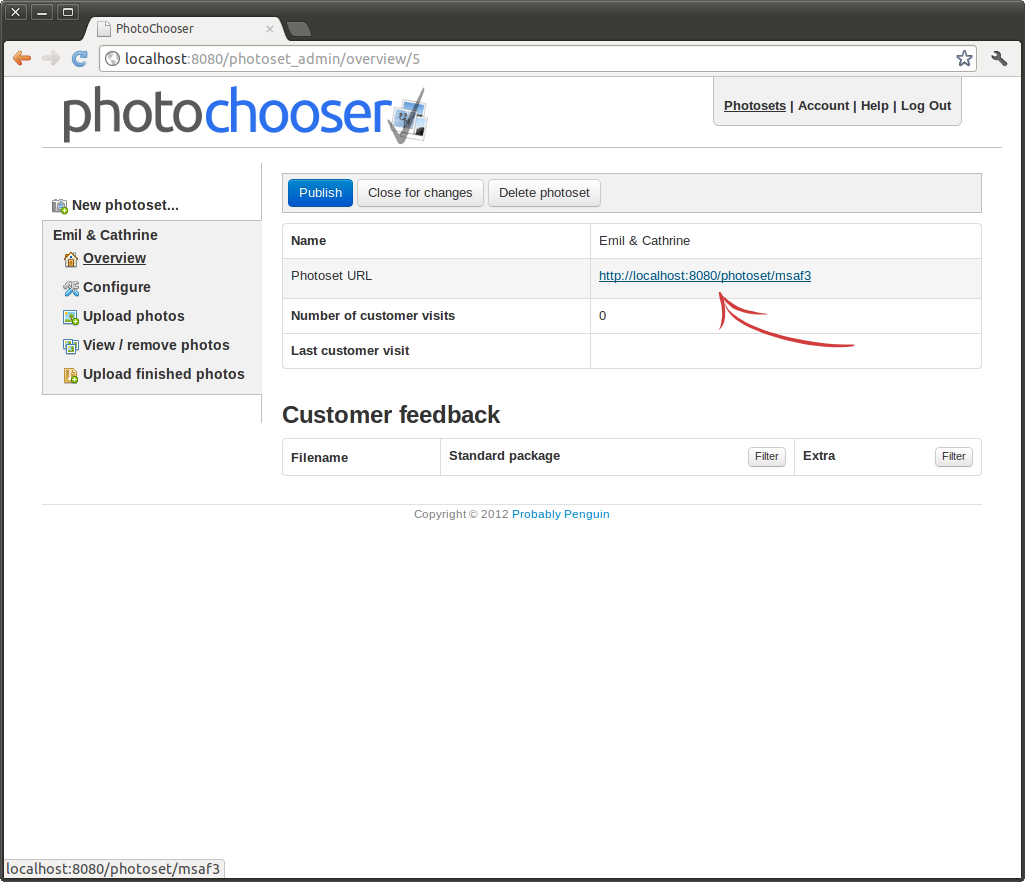
9. Open the private gallery
Before sending the gallery to your customer you should check that all photos and the gallery look as you expect. To do this click the link and it will open up in a new window. This link is the one you will send to your customer.
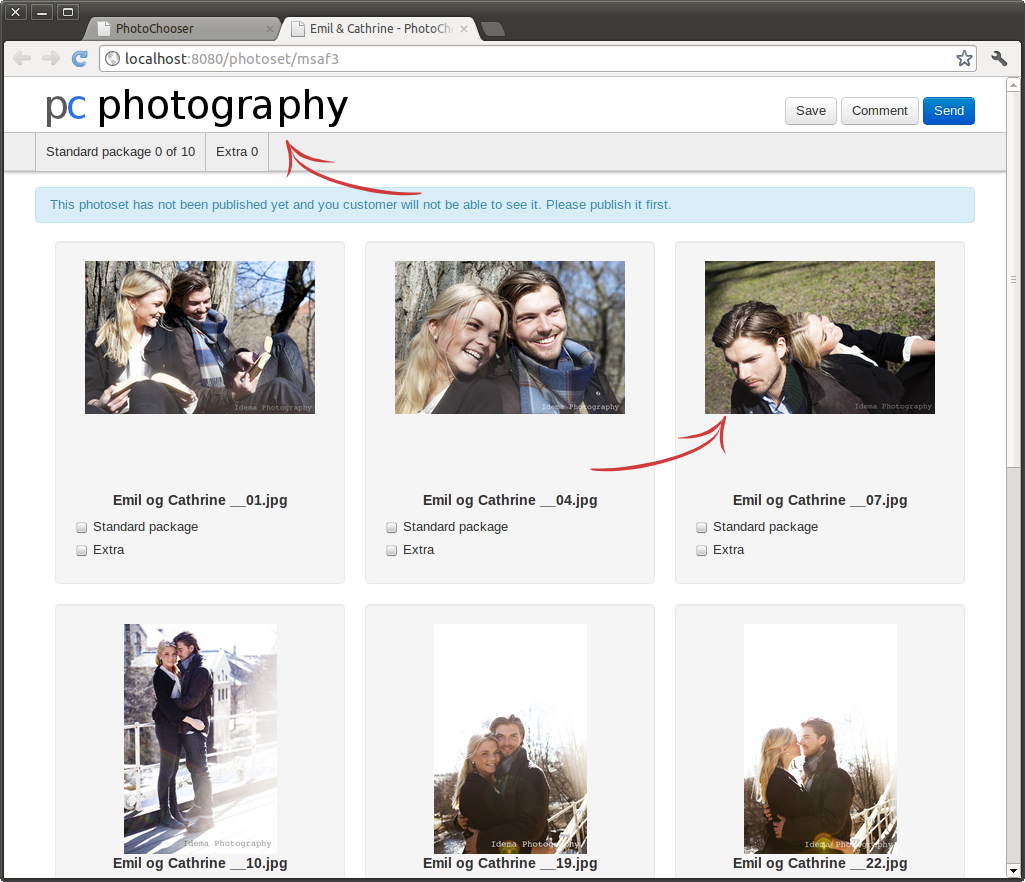
10. Private gallery
This page is the actual page that your customer will use. As you can see your company logo is displayed at the top and all photos are displayed as small thumbnails.
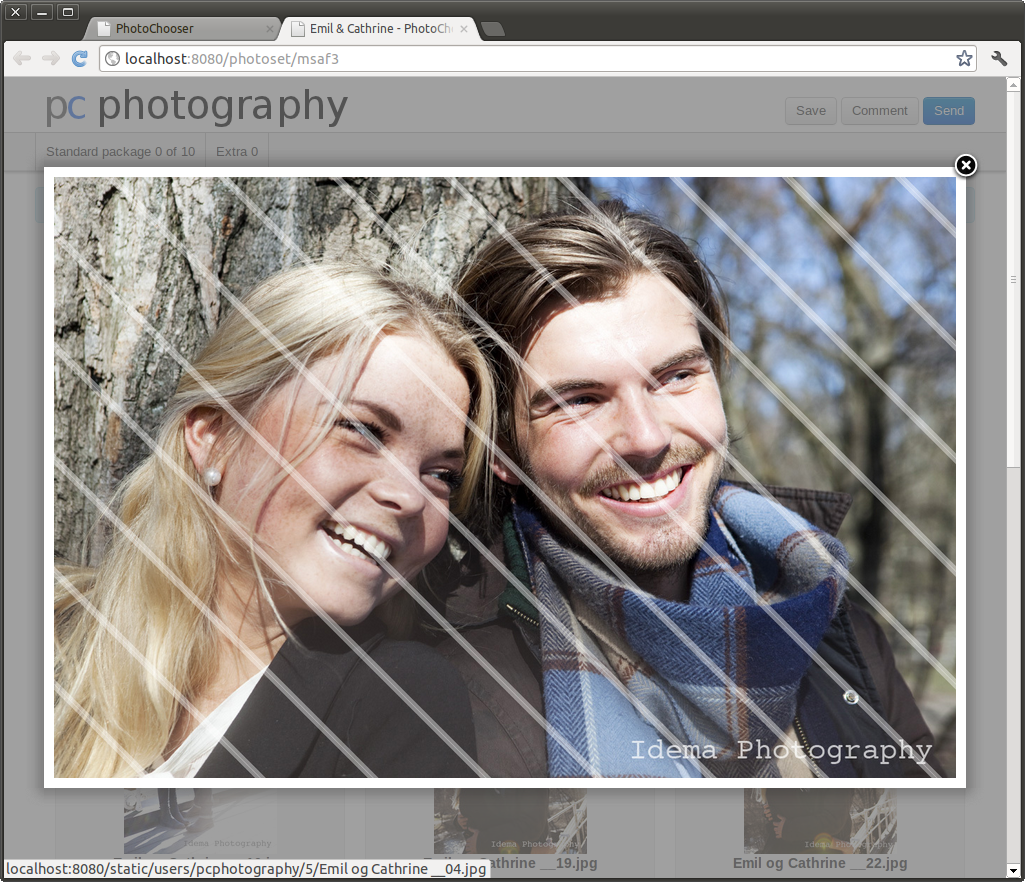
11. Larger photos
When clicking on one of the thumbnails a bigger version of the photo is displayed. As you can see the photo has been
watermarked, but as you know you can skip this feature and upload the photos without the watermark.
The size of this photo is up to you when you upload. The system will not resize these photos so just use the size you
want.
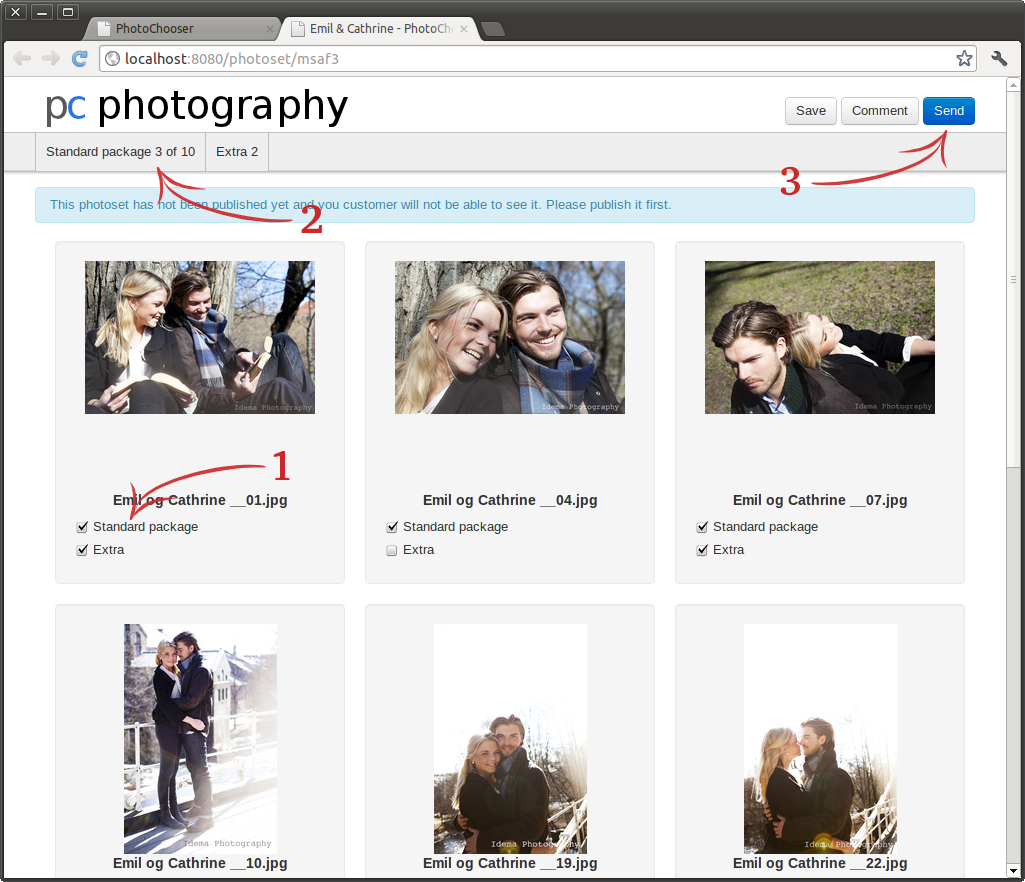
12. Selections
The selections that you configured are displayed below each photo. And at the top of the screen your customer can see how
many selections they have made so far.
When they are finished they press the Send button and all the their selections will be sent to your email. They can also add
comments before sending their selections to you. If they cannot complete the selection in one go, they can save their
selections and finish the selection later.
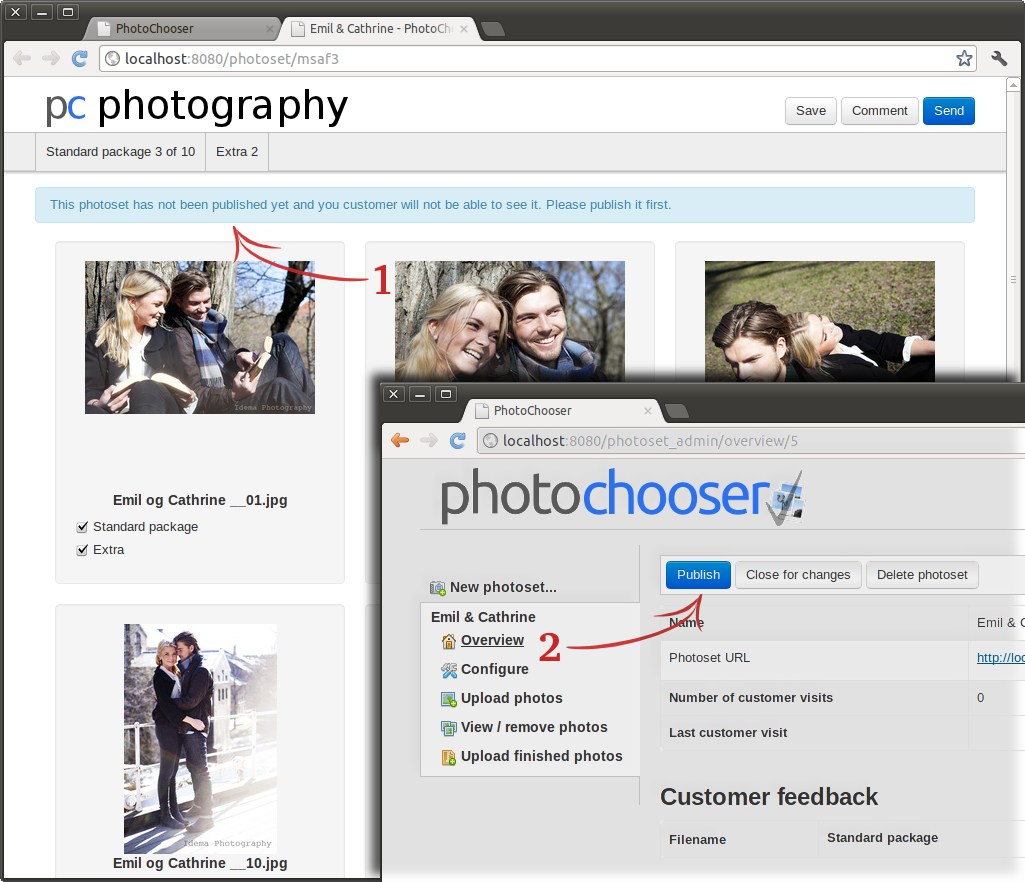
13. Publish gallery
The gallery is currently completely hidden from the world and can only be viewed by you as long as you are logged in.
To make it accessible it to your customer you need to publish it first.
Publishing the photoset is done on the Overview page. Click the "Publish" button and the gallery is now accessible to
your customer. To give them access to the gallery just send the link and wait for their feedback.
All photos are courtesy of Idema Photography.