How to Create and Manage Watermarks
6 steps to create and manage your own watermarks
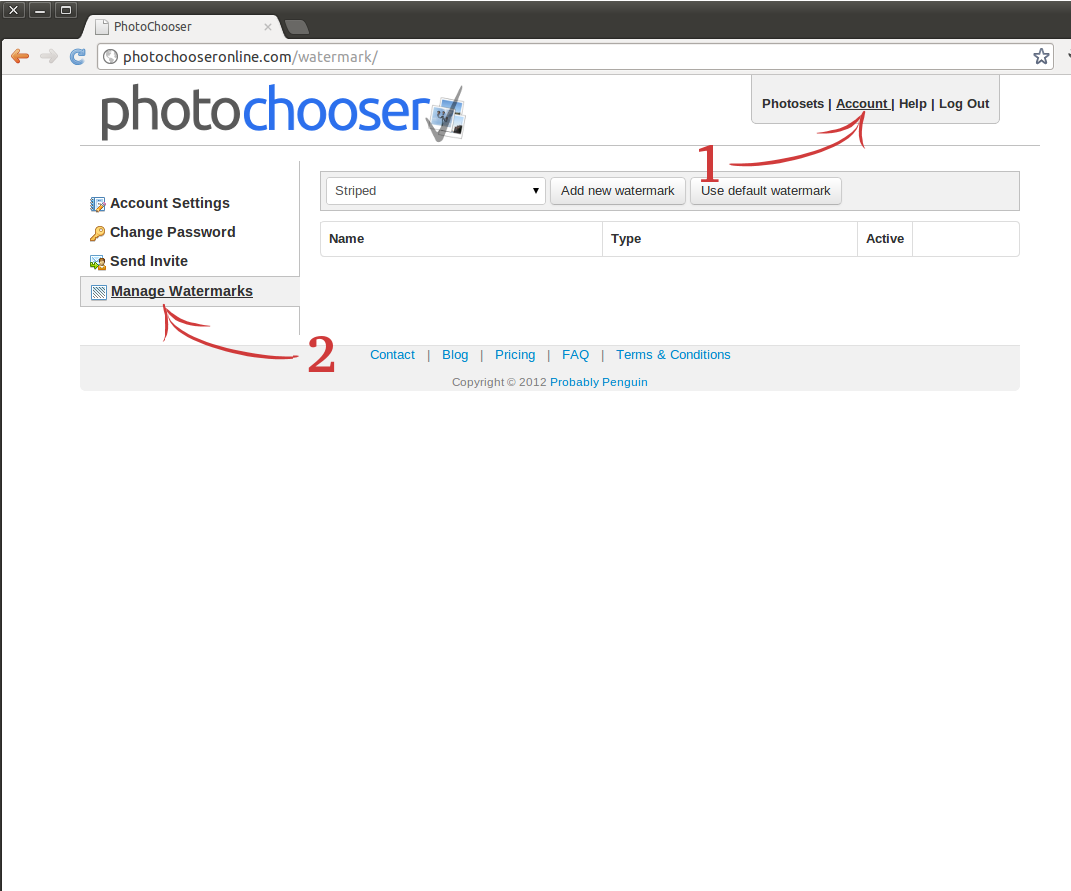
1. Go to the Account and then Manage watermarks
After you have logged in click Account in the top right corner (1) and then click Manager Watermarks in the left menu (2). This page show all you watermarks. Here you can make new watermarks, delete old ones and select which watermark to use.
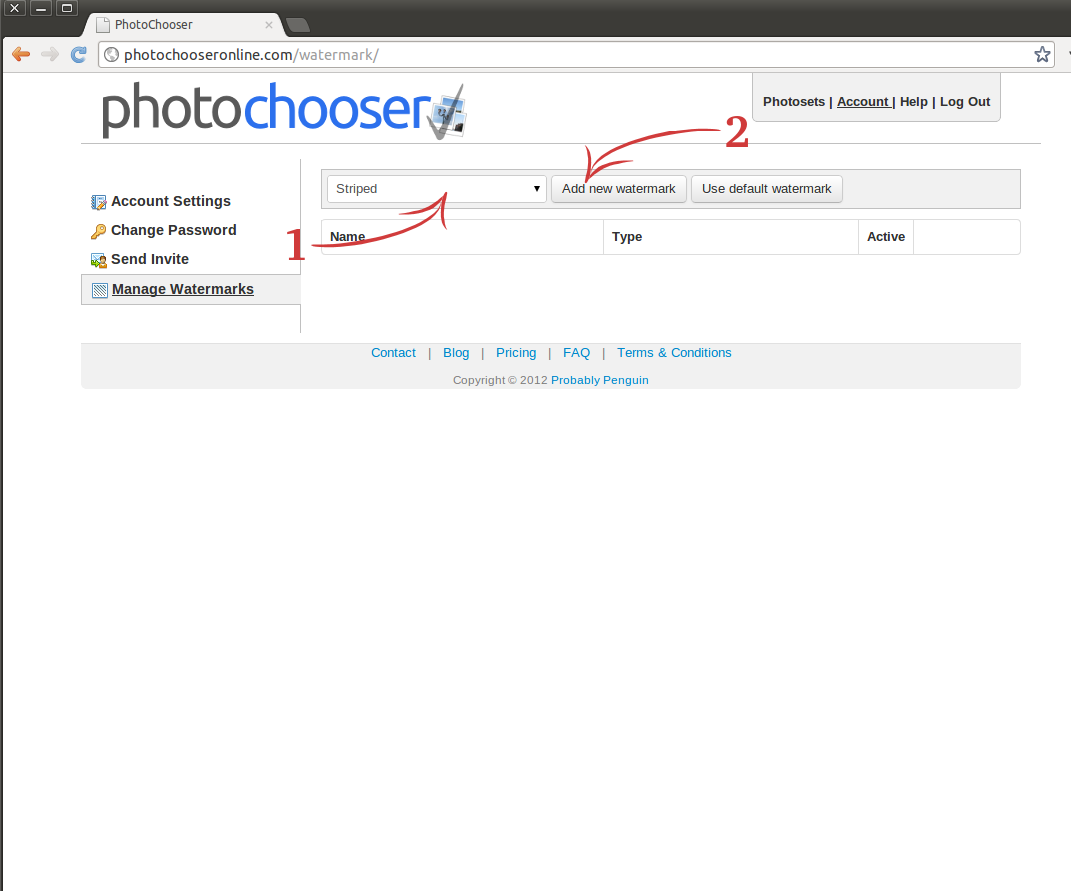
2. Create a new watermark
Select the type of watermark that you want (1) and then click Add new watermark (2).
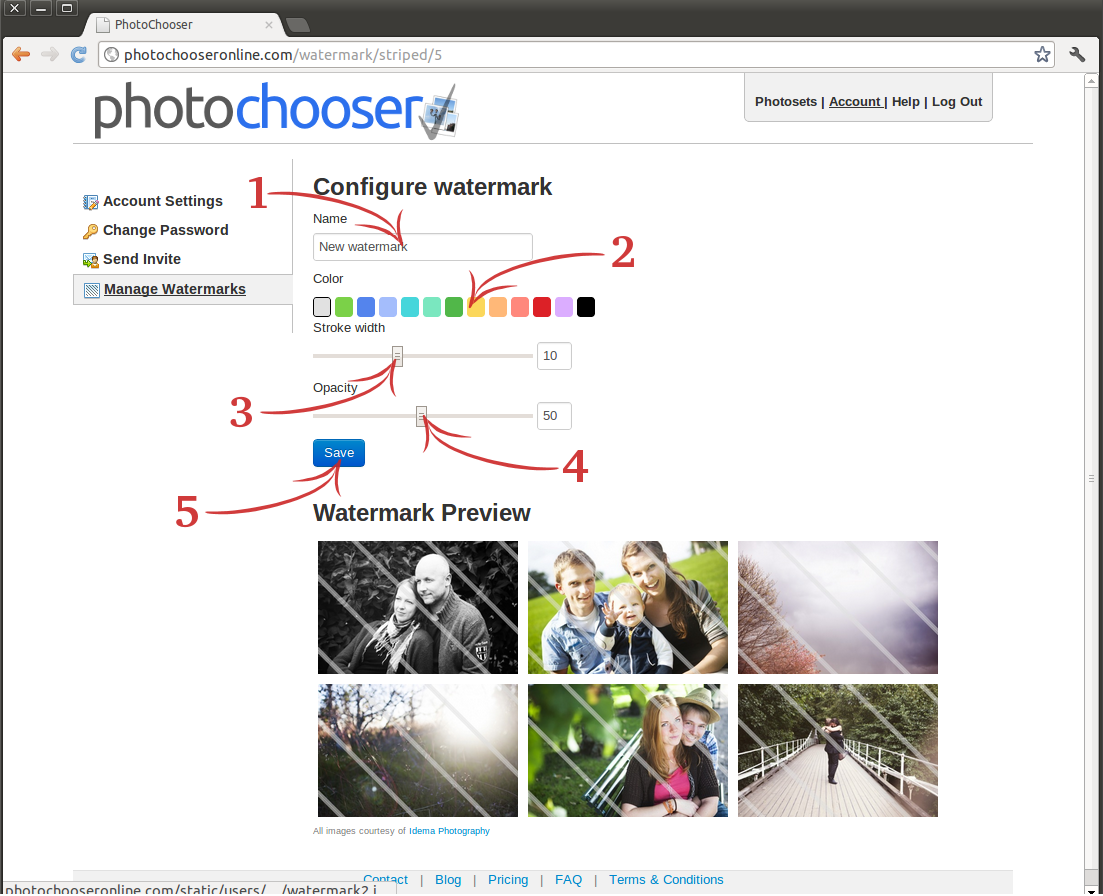
3. Configure watermark
Now you can configure the watermark. This shows the configuration for a striped watermark.
Start by giving it a descriptive name (1). Then change the color (2),
the stroke width (3) and the opacity (4). End the configuration by pressing Save (5).
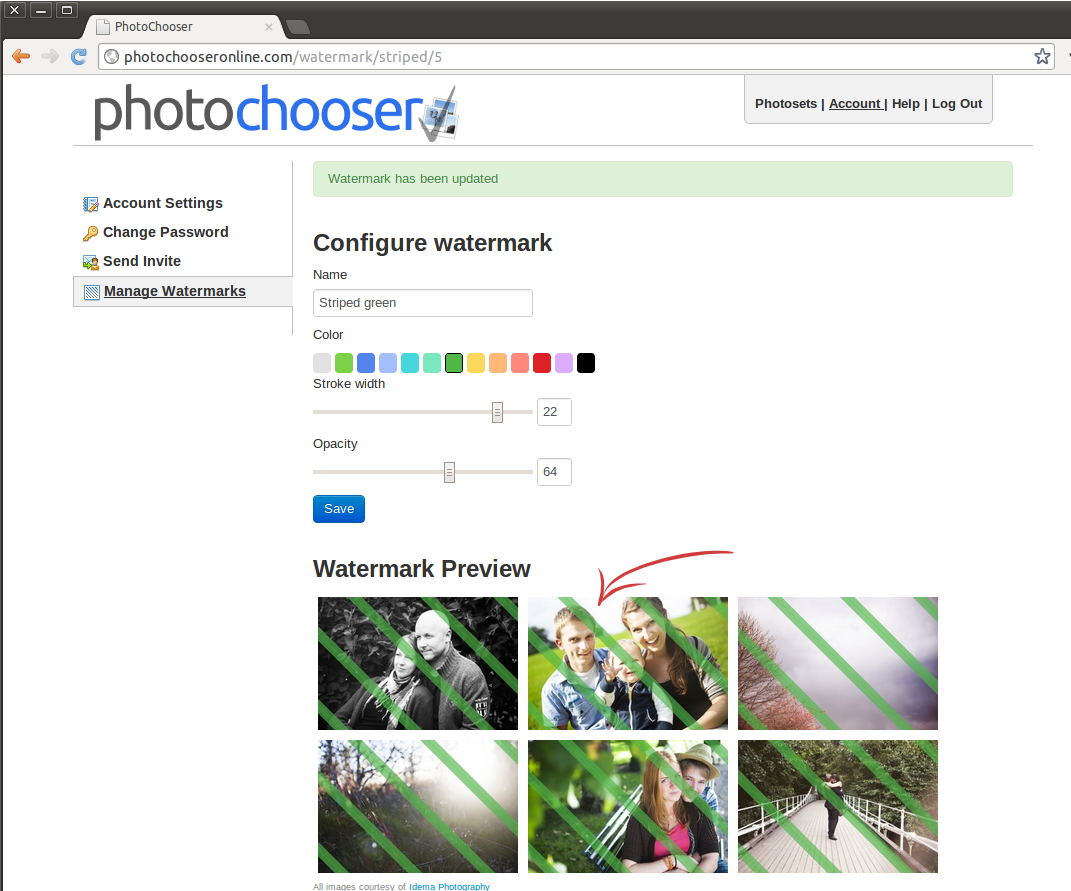
4. Check watermark previews
Your changes have now been saved and the watermark previews at the bottom have been updated. Just repeat the process
until you are satisfied with the result.
If want to view a big version of the preview just click on the image on it and a slightly bigger version will
be shown.
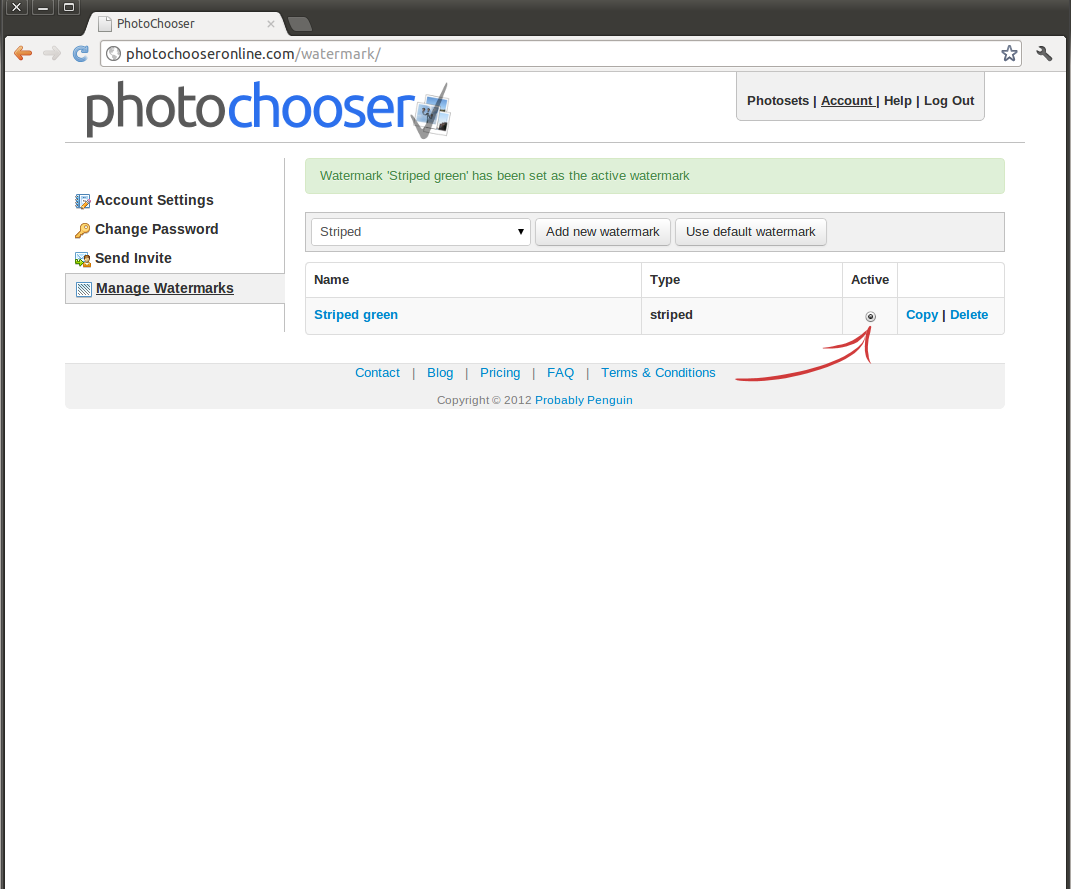
5. Activate watermark
To start using a different watermark than the default one you need to active on of them. Just click active on the one you would like to use.

6. Go back to the default watermark
If you would like to go back to the default one just click the "Use default watermark" button.